
In this post, I explain my findings of how to maximise geometric fidelity of models through predefined camera settings and best practice site behaviours.
It is designed to summarise the required behaviours and technical considerations to achieve great photogrammetry results. Focus is placed on architectural and engineering use cases: Spaces, surfaces and datum features.
What constitutes ‘great’?
- A model which has even colour, textures and lighting.
- A model which has smooth (not noisy) surfaces so lightweight exports can be produced.
- Detailed areas don’t have holes or disjointed areas (e.g. cables, tubes, handles, chains)
- A model which is free from distortion (the ‘Banana’ effect, overlapped or misaligned areas).
Setup
Rules of thumb
Environmental considerations
- Shoot on an overcast day if possible (smooth lighting and minimal shadows).
- Less wind is preferable. Wind causes movement for loose or flexible objects and reduces the ability to align between photographs.
- Early morning or evenings – reduces the amount of onlookers or interruptions.
Camera / Mobile phone
Cameras
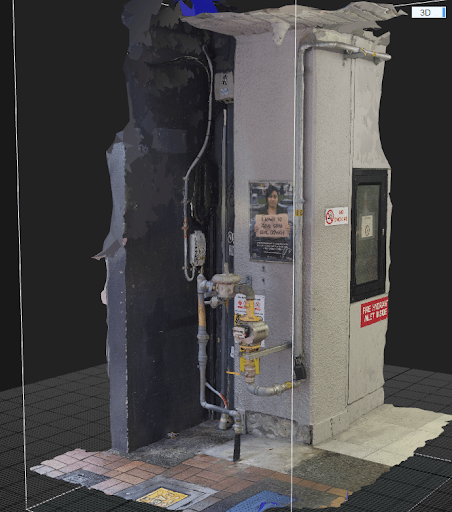
The best results for spaces are produced by DSLR cameras. This example was produced with a DSLR. The advantage of using DSLRs are lower image sizes and better registration success rates. These are some key settings.
- Low focal length, to capture background objects as well as foreground.
- Small aperture size to maximise depth of field (as much of the environment is in focus as possible).
- Image format set to RAW. Although this creates larger files, this improves registration success as less compression for the sampling algorithm in your photogrammetry processing software means better feature detection.
Mobile Phones
Mobile phones are recommended less as a desirable device type, but in some instances they can prove successful. This and this was captured using a mobile phone set to the settings below.
- Highest resolution possible (64 megapixel camera is optimal)
- Turn off all post processing. (Adaptive exposure, sharpening and filters).
- Moderate shutter speed (try default first).
- Turn on location features. This can imprint useful metadata (GPS) into the photo files
Capture
Rules of thumb
Movement
- Don’t stand in one place and shoot many angles. Move your body through space instead. This creates parallax between views.
- Complete ‘loops’ and ‘lines of return’ while walking around objects or spaces.
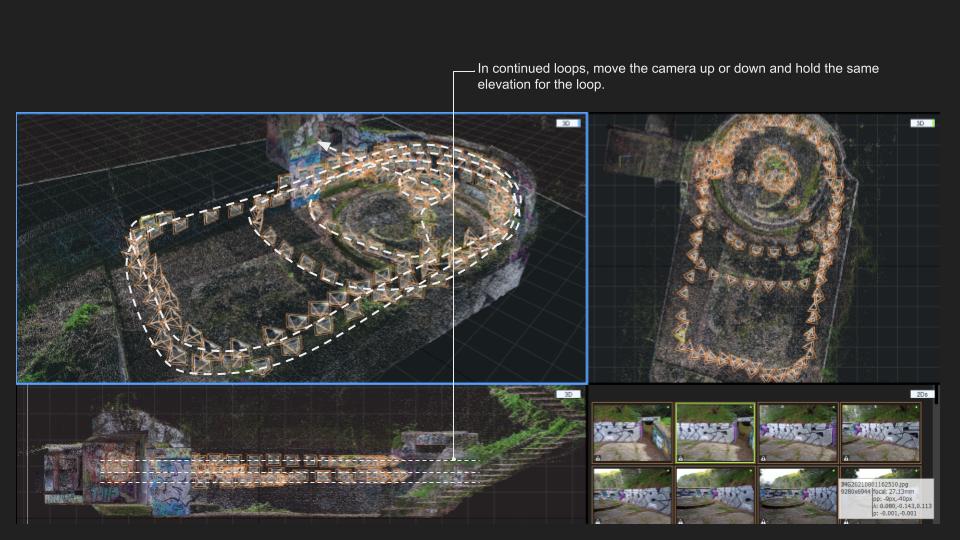
- Hold the camera at various heights after completing loops or lines.
- One image, one step.
- Create a high degree of overlap between photos (the same point seen in the next 2 photos).
Camera / Mobile phone
- Consistent aspect. Landscape preferred.
- Remember to pause to reduce blur between steps.
Loops
When capturing internal spaces, stand with your back close to the wall, and shoot to the opposite side of the space, across an imagined centre point.
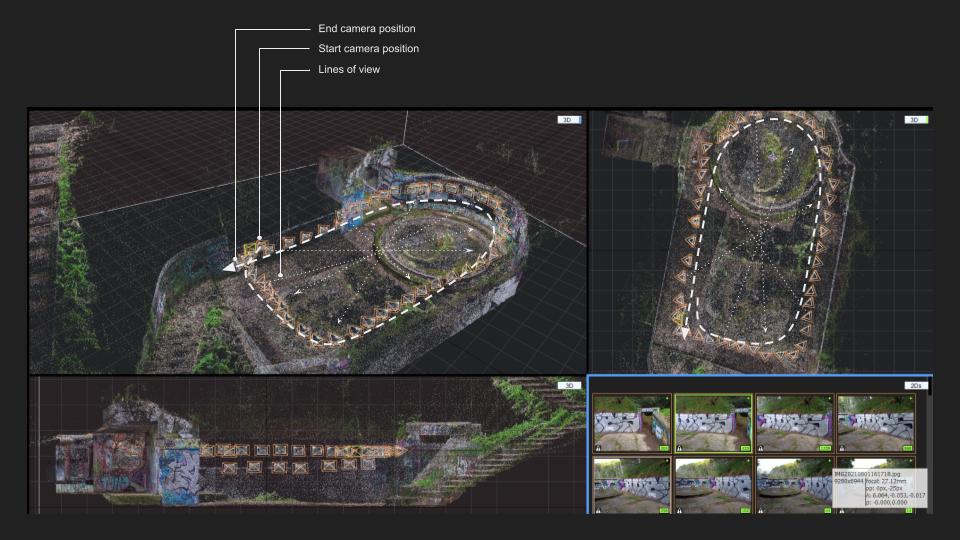
Loops – Continued
Come back to the starting point of the loop and continue past it.
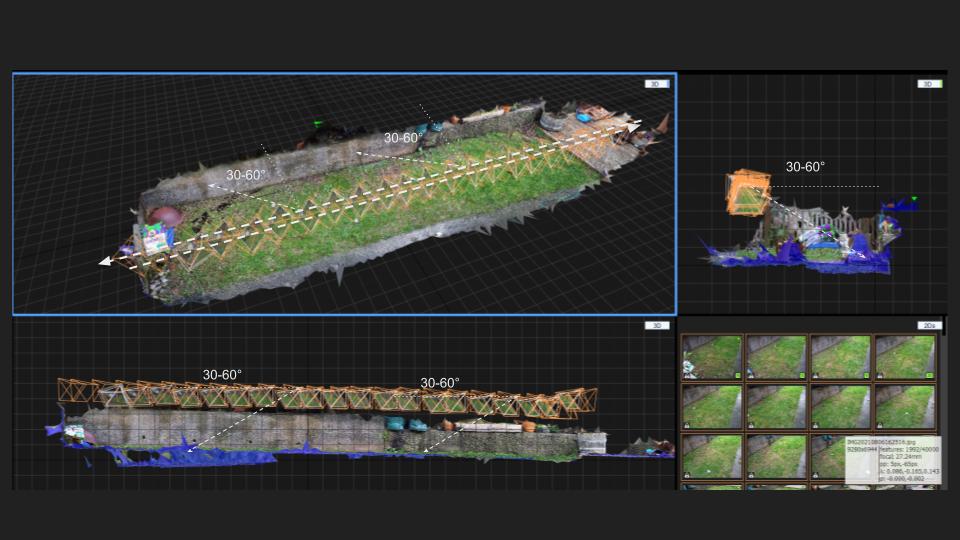
Lines
When capturing flat outdoor surfaces, create lines of shots which are held at angles offset from ‘square’ site axes.
Take a shot every half metre, as the subject surface is relatively closer compared to other situations (for example a wall on the opposite side of a space).
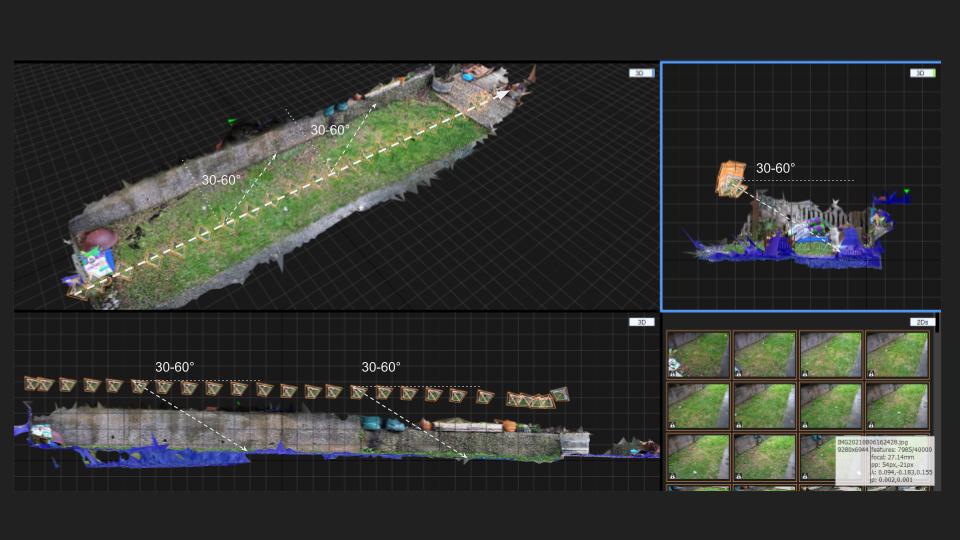
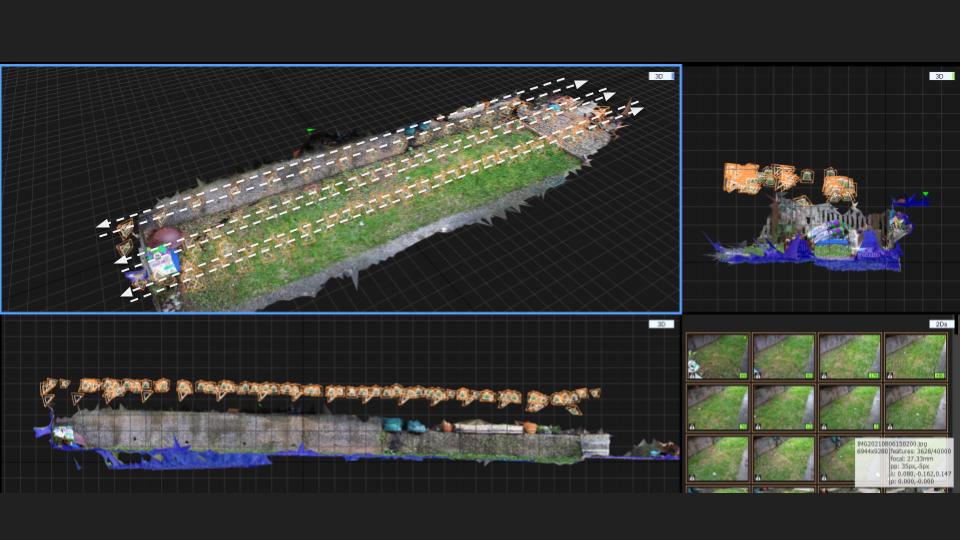
Lines – Returned
Walk a similar line back to your starting position.
Hold the camera at similar (‘mirrored’) angles to the first.
Lines – Continued
Walk multiple lines up and down the site, with about a metre between each. Try to come back to the start of each line, and provide sufficient photo overlaps at the ends.
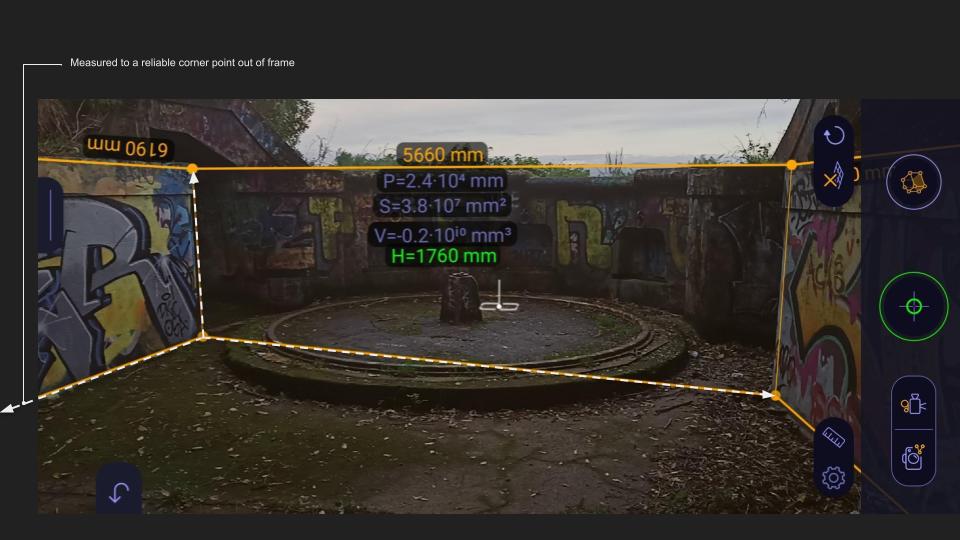
Finally – Measurement References!
Traditional measurements between known points are required to ‘scale’ the site model after processing. These must be taken in each approximate x,y and z axes.
Measure to sturdy and sharp features which will ideally not move or be removed during the project.
The image below shows the use of a digital app, however good physical measurements (+/- 5mm) are preferable.
A marked-up photo or hand produced diagram is more than acceptable.
That’s it for now. Check out some of the projects on this site to see various outputs using the awesome RealityCapture software among others.
